Get started
Intellinode provides one chatbot interface for OpenAI, Anthropic Claude, Google Gemini, Mistral, Cohere, NVIDIA, self-hosted vLLM, every OpenAI-compatible service (OpenRouter, Groq, DeepSeek, xAI, Together, Ollama, LM Studio) and Llama through Replicate or AWS SageMaker.
All the models are available with the unified chatbot interface with a minimum code change when switching between models. The pages that follow cover multi-turn conversations, tool calling, structured JSON output, the OpenAI-compatible providers and the retries & timeouts.
OpenAI
- Import the necessary modules from IntelliNode. This will include the
Chatbot,ChatGPTInput, andChatGPTMessageclasses.
const { Chatbot, ChatGPTInput, ChatGPTMessage } = require('intellinode');
- To use OpenAI, you'll need a valid API key. Create a
Chatbotinstance, providing the API key and 'openai' as the provider.
const chatbot = new Chatbot(OPENAI_API_KEY, 'openai');
- Construct a chat input instance and add user messages. GPT-5.5 is the default model; gpt-5 and newer models are sent to the Responses API with a reasoning effort of
lowunless you set one:
const system = 'You are a helpful assistant.';
const input = new ChatGPTInput(system, { model: 'gpt-5.5', effort: 'medium' });   // effort: none, low, medium, high, xhigh
input.addUserMessage('Explain the plot of the Inception movie in one line.');
- Use the
chatbotinstance to send chat input:
const responses = await chatbot.chat(input);

responses.forEach(response => console.log('- ', response));
Older chat-completions models keep working with the same input, for example new ChatGPTInput(system, { model: 'gpt-4.1', temperature: 0.7, maxTokens: 500 }).
Streaming
Call chatbot.stream to receive the answer as it is generated:
let response = '';
for await (const contentText of chatbot.stream(input)) {
  response += contentText;
  process.stdout.write(contentText);
}
The stream function is supported for openai, anthropic, mistral, cohere, nvidia, vllm and the OpenAI-compatible providers.
Anthropic
Claude Sonnet 5 is the default model; use claude-opus-5, claude-fable-5-1 or claude-haiku-4-5 to switch.
- Import the
ChatbotandAnthropicInputmodules.
const { Chatbot, AnthropicInput, SupportedChatModels } = require('intellinode');
- Initiate the chatbot object with a valid api key from (console.anthropic.com).
const bot = new Chatbot(apiKey, SupportedChatModels.ANTHROPIC);
- Prepare the input and select your preferred claude model.
const input = new AnthropicInput('You are an art expert.', { model: 'claude-sonnet-5', maxTokens: 4096 });
input.addUserMessage('Who painted the Mona Lisa?');
- Call the chatbot and parse the responses.
const responses = await bot.chat(input);
The Claude 5 models think adaptively and the thinking counts toward maxTokens (default 2048), so raise it for long answers.
Google Gemini
- Import the
ChatbotandGeminiInputmodules.
const { Chatbot, GeminiInput, SupportedChatModels } = require('intellinode');
- Initiate the chatbot object with a key from Google AI Studio.
const geminiBot = new Chatbot(apiKey, SupportedChatModels.GEMINI);
- Prepare the input (Gemini 3.6 Flash is the default model).
const input = new GeminiInput('You are a helpful assistant.', { model: 'gemini-3.6-flash' });
input.addUserMessage('Who painted the Mona Lisa?');
- Call the chatbot and parse the responses.
const responses = await geminiBot.chat(input);
Mistral AI
- Import the
ChatbotandMistralInputmodules.
const { Chatbot, MistralInput, SupportedChatModels } = require('intellinode');
- Initiate the chatbot object with a valid api key from (mistral.ai).
const mistralBot = new Chatbot(apiKey, SupportedChatModels.MISTRAL);
- Prepare the input and select your preferred mistral model like
mistral-medium-latest(default),mistral-small-latestormagistral-medium-latest.
const input = new MistralInput('You are an art expert.', { model: 'mistral-medium-latest' });
input.addUserMessage('Who painted the Mona Lisa?');
- Call the chatbot and parse the responses.
const responses = await mistralBot.chat(input);
Cohere
- Import the necessary modules.
const { Chatbot, CohereInput, SupportedChatModels } = require('intellinode');
- Initiate the chatbot object with a valid api key from (cohere.com).
const bot = new Chatbot(process.env.COHERE_API_KEY, SupportedChatModels.COHERE);
- Prepare the input; Command A (
command-a-03-2025) is the default model.
const input = new CohereInput('You are a helpful computer programming assistant.');
input.addUserMessage('What is the difference between Python and Java?');
- Call the chatbot and parse the responses.
const responses = await bot.chat(input);
responses.forEach((response) => console.log('- ' + response));
NVIDIA, vLLM and OpenAI-compatible services
- NVIDIA hosted models and local NIM: see DeepSeek & Llama.
- Self-hosted vLLM: see vLLM Integration.
- OpenRouter, Groq, DeepSeek, xAI, Together, Ollama and LM Studio: see OpenAI-compatible providers.
Llama Model
Integration with Llama is attainable via two options, using:
- Replicate's API: simple integration.
- AWS SageMaker: hosted in your account for extra privacy and control (SageMaker steps).
Replicate's Llama Integration
- Import the necessary classes.
const { Chatbot, LLamaReplicateInput, SupportedChatModels } = require('intellinode');
- You'll need a valid API key. This time, it should be for replicate.com.
const chatbot = new Chatbot(REPLICATE_API_KEY, SupportedChatModels.REPLICATE);
- Create the chat input with
LLamaReplicateInput
const system = 'You are a helpful assistant.';
const input = new LLamaReplicateInput(system);
input.addUserMessage('Explain the plot of the Inception movie in one line.');
- Use the
chatbotinstance to send chat input:
const response = await chatbot.chat(input);

console.log('- ', response);
AWS SageMaker Integration
Integration with the Llama model via AWS SageMaker, providing an additional layer of control, is achievable through IntelliNode.
IntelliNode Integration
- Import the necessary classes:
const { Chatbot, LLamaSageInput, SupportedChatModels } = require('intellinode');
- With AWS SageMaker, you'll be providing the URL of your API gateway, the steps to deploy your model and get the URL in the Prerequisite section:
const chatbot = new Chatbot(null /*replace with the API key, or null if the API gateway key not used*/,
                            SupportedChatModels.SAGEMAKER,
                            {url: process.env.AWS_API_URL /*replace with your API gateway url*/});
- Create the chat input with
LLamaSageInput:
const system = 'You are a helpful assistant.';
const input = new LLamaSageInput(system);
input.addUserMessage('Explain the plot of the Inception movie in one line.');
- Use the
chatbotinstance to send the chat input:
const response = await chatbot.chat(input);

console.log('Chatbot response:' + response);
Prerequisite to Integrate AWS SageMaker and IntelliNode

The steps to leverage AWS SageMaker for hosting the Llama model:
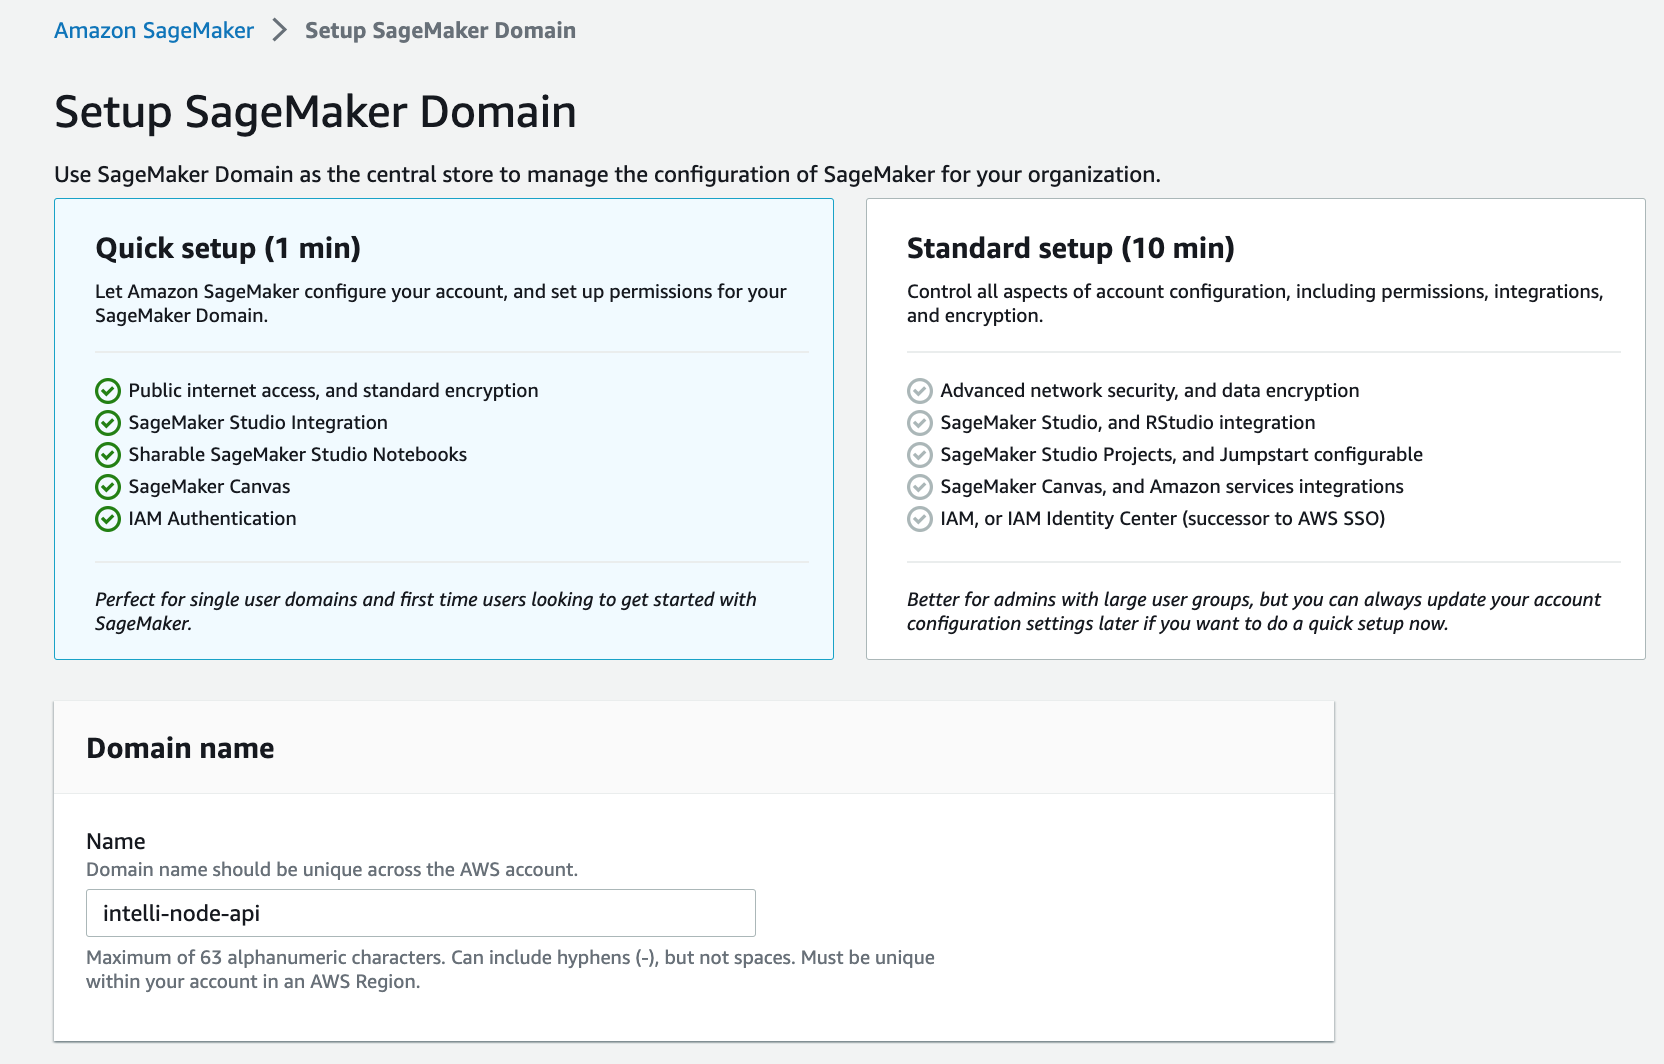
- Create a SageMaker Domain: Begin by setting up a domain on your AWS SageMaker. This step establishes a controlled space for your SageMaker operations.
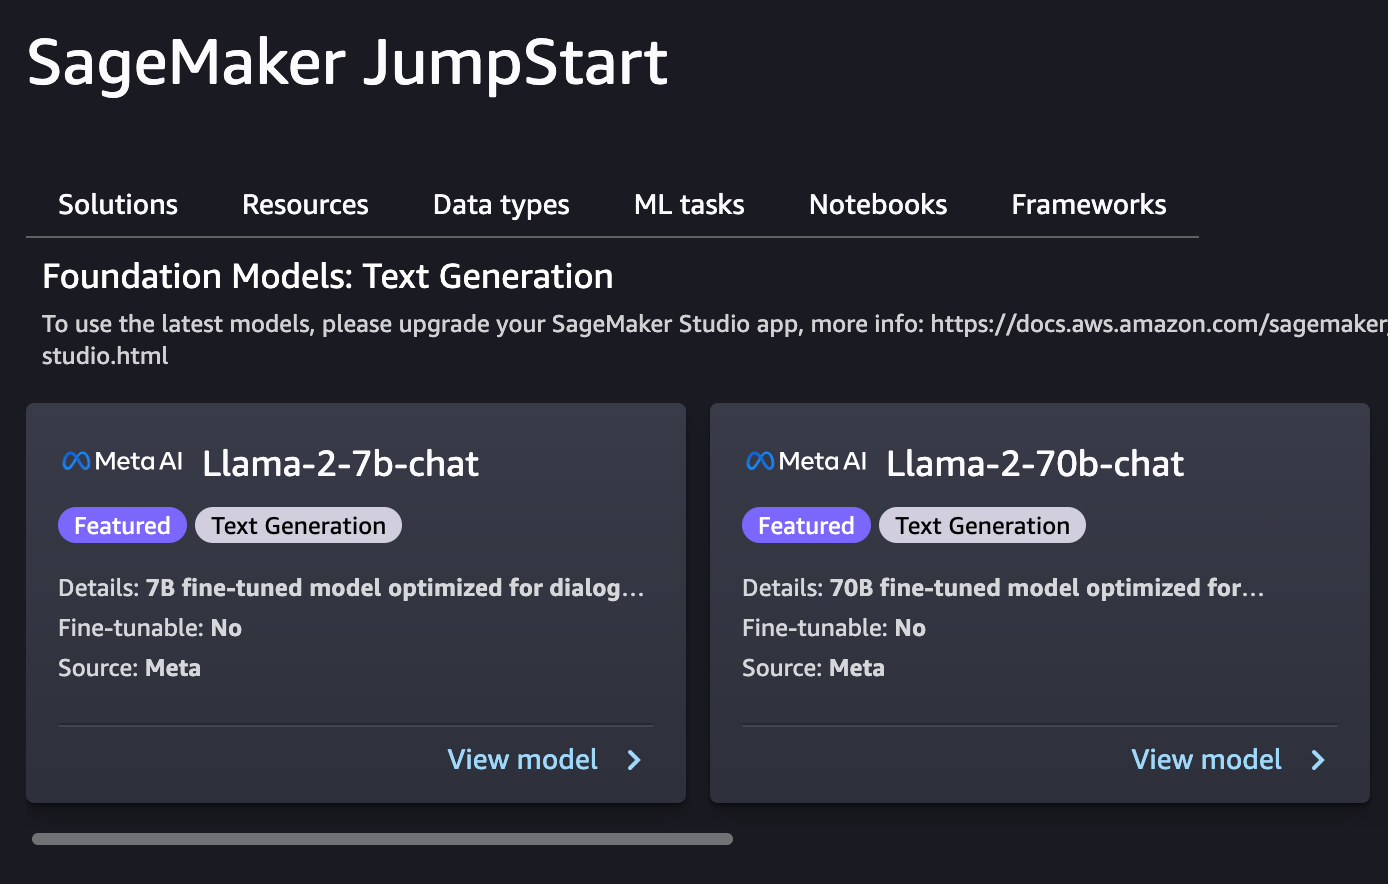
- Deploy the Llama Model: Utilize SageMaker JumpStart to deploy the Llama model you plan to integrate.
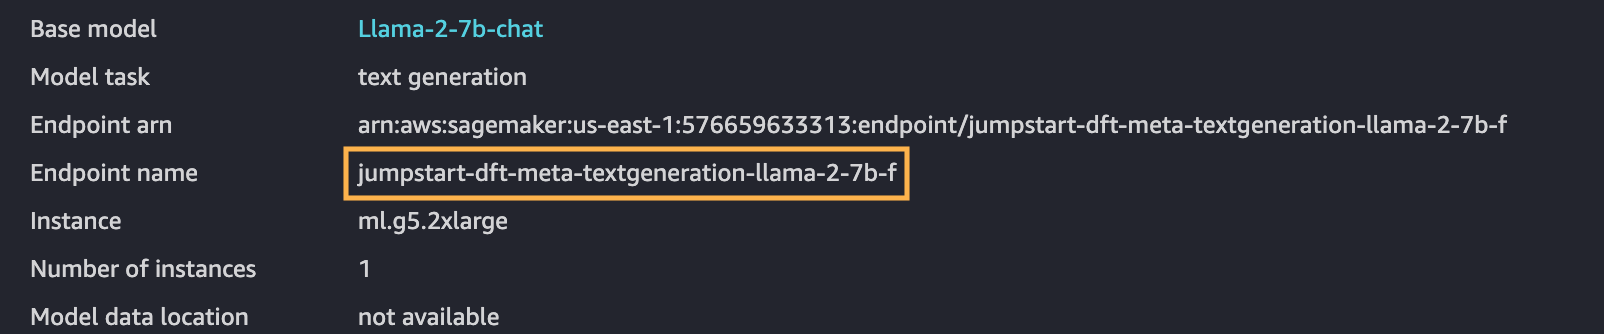
- Copy the Endpoint Name: Once you have a model deployed, make sure to note the endpoint name, which is crucial for future steps.
-
Create a Node.js Lambda Function: AWS Lambda allows running the back-end code without managing servers. Create a Node.js lambda function to use for integrating the deployed model.
-
Set Up Environment Variable: Create an environment variable named
llama_endpointwith the value of the SageMaker endpoint. -
Intellinode Lambda Import: You need to import the prepared Lambda zip file that establishes a connection to your SageMaker Llama deployment. This export is a zip file, and it can be found in the lambda_llama_sagemaker directory.
-
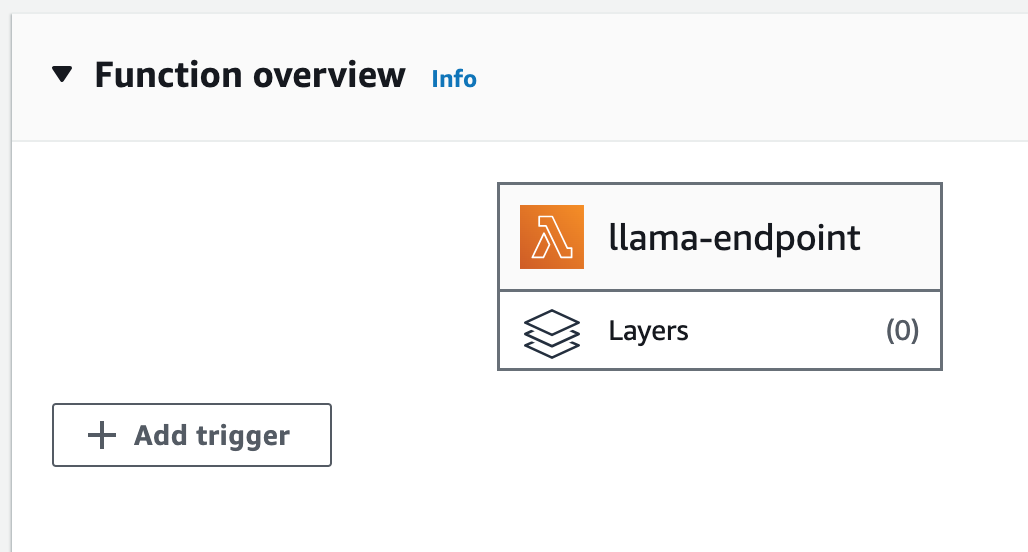
API Gateway Configuration: Click on the "Add trigger" option on the Lambda function page, and select "API Gateway" from the list of available triggers.
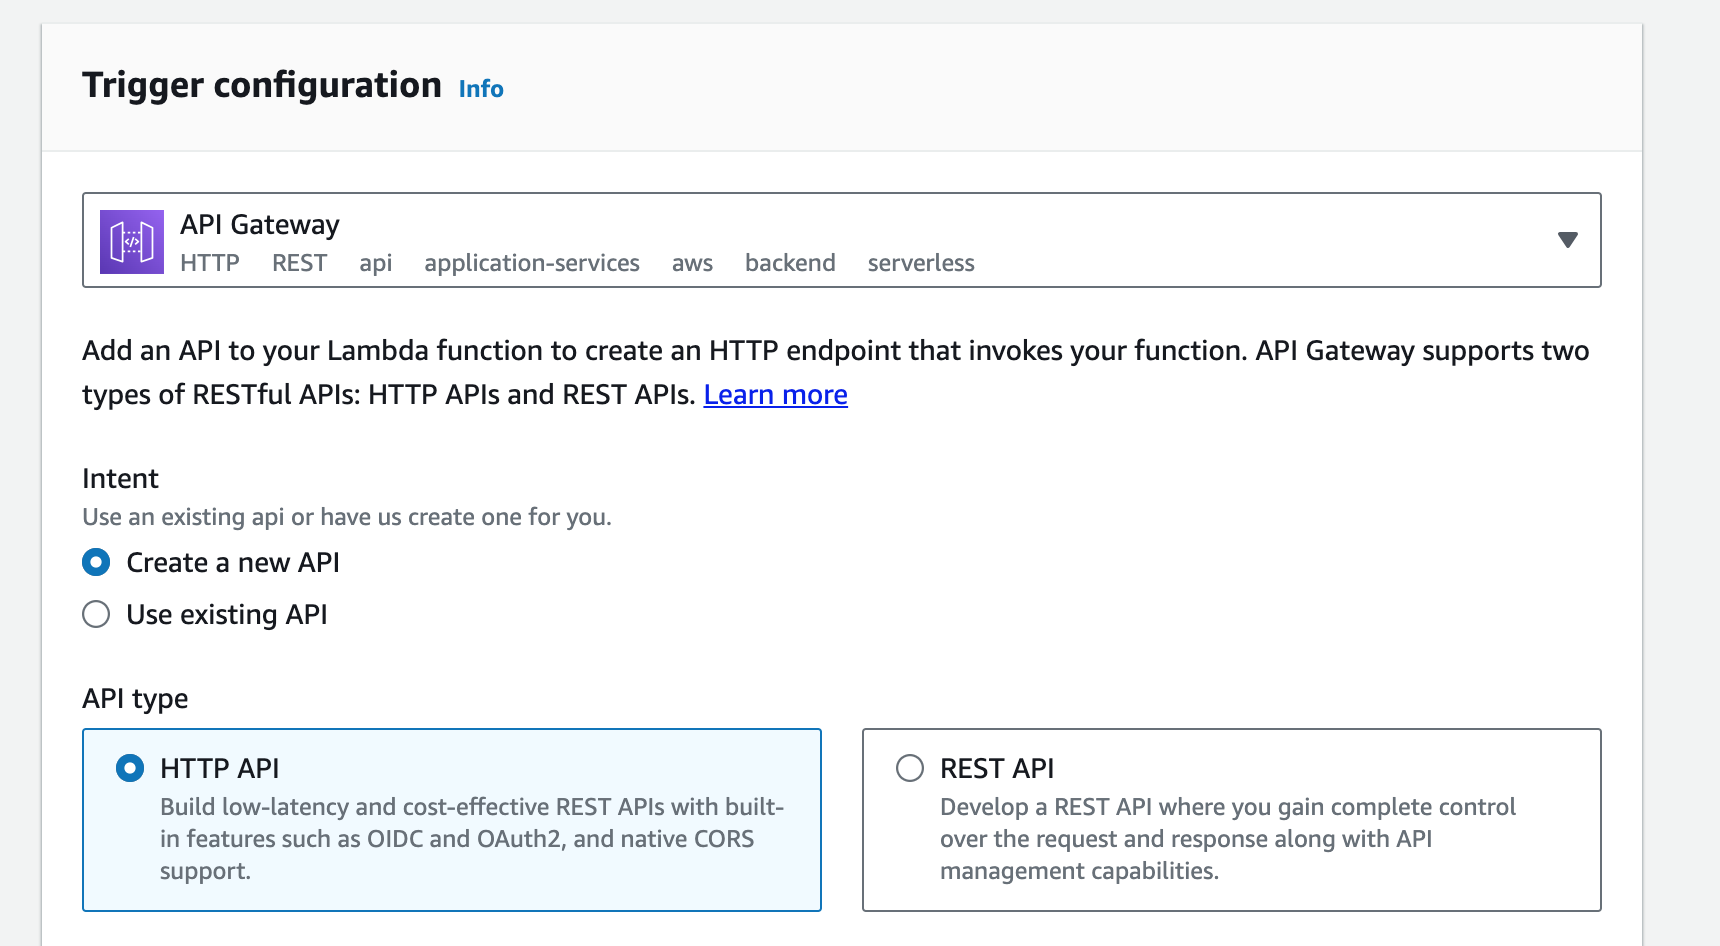
- Lambda Function Settings: Update the lambda role to grant necessary permissions to access SageMaker endpoints. Additionally, the function's timeout period should be extended to accommodate the processing time. Make these adjustments in the "Configuration" tab of your Lambda function.
Once you complete these steps, your AWS SageMaker will be ready to host and run the Llama model, and you can easily integrate it with IntelliNode.